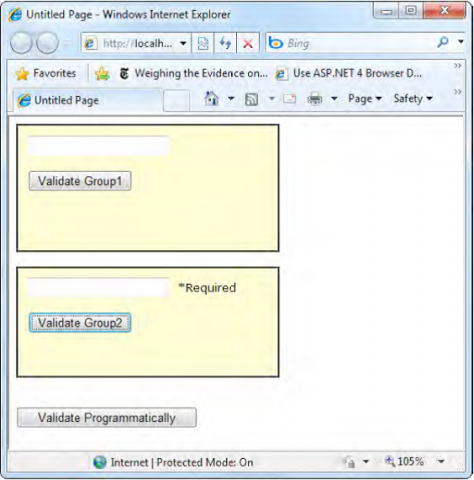
In more complex pages, you may want to perform validation separately, by using several distinct groups of controls, possibly in separate panels. ASP.NET 4.0 enables this scenario with a feature called validation groups. To create a validation group, you need to put the input controls and the CausesValidation button controls into the same logical group. You can do this by setting the ValidationGroup property of every control with the same descriptive string (such as “Client” or “Address”). Every button control that provides a CauseValidation property also includes the ValidationGroup property. All validators acquire the ValidationGroup by inheriting from the BaseValidator class.
The next example defines two validation groups, named Group1 and Group2:
<form id=”form1″ runat=”server”>
<div>
<asp:Panel ID=”Panel1″ runat=”server”>
<asp:TextBox ID=”TextBox1″ ValidationGroup=”Group1″ runat=”server” />
<asp:RequiredFieldValidator ID=”RequiredFieldValidator1″
ErrorMessage=”*Required” ValidationGroup=”Group1″
runat=”server” ControlToValidate=”TextBox1″ />
<asp:Button ID=”Button1″ Text=”Validate Group1″
ValidationGroup=”Group1″ runat=”server” />
</asp:Panel>
<br />
<asp:Panel ID=”Panel2″ runat=”server”>
<asp:TextBox ID=”TextBox2″ ValidationGroup=”Group2″ runat=”server” />
<asp:RequiredFieldValidator ID=”RequiredFieldValidator2″
ErrorMessage=”*Required” ValidationGroup=”Group2″
ControlToValidate=”TextBox2″ runat=”server” />
<asp:Button ID=”Button2″ Text=”Validate Group2″
ValidationGroup=”Group2″ runat=”server” />
</asp:Panel>
</div>
</form>
The next picture shows the page. If you click the first button, only the first text box is validated. If you click the second button, only the second text box is validated.
In your code, you can work with the validation groups programmatically. You can retrieve the controls in a given validator group using the Page.GetValidators() method. Just pass the name of the group as the first parameter. You can then loop through the items in this collection and choose which ones you want to validate, as shown in the article How to create a manual validation in ASP.NET 4.0.
Another option is to use the Page.Validate() method and specify the name of the validation group. For example, using the previous page, you could create a button with no validation group assigned and respond to the Click event with this code:
protected void cmdValidateAll_Click(object sender, EventArgs e)
{
Label1.Text = “Initial Page.IsValid State: ” + Page.IsValid.ToString();
Page.Validate(“Group1”);
Label1.Text += “<br />Group1 Valid: ” + Page.IsValid.ToString();
Page.Validate(“Group2”);
Label1.Text += “<br />Group1 and Group2 Valid: ” + Page.IsValid.ToString();
}

