ASP.NET provides a ready-to-use infrastructure for managing and using roles. This extensible infrastructure Includes prebuilt functionality for managing roles. You can use it to assign roles to users and to access all the role information from your code.
In more detail, the roles infrastructure includes the following:
– A provider-based extensible mechanism for including different types of role data stores.
– Ready-to-use implementation of a provider for SQL Server and the necessary database tables based on the Membership database. These tables associate membership user entries with roles in a many-to-many relationship and are automatically created when calling the aspnet_regsql.exe tool. Note: If you want to find more information you can use search mechanisms of our site by using word Membership or word Aspnet_regsql.
– The prebuilt RolePrincipal class that is automatically initialized for authenticated users through the RoleManagerModule (also included with the roles infrastructure).
– Complete programmatic access to the roles through the Roles class.
You can use this infrastructure in two possible ways:
1. Check the Enable Roles for This Web Site Box when you are running running through the Security Setup Wizard
2. Click the Enable Roles link in the Security tab of the WAT
The next pictures illustrate this:
In both cases, the tool adds a little configuration entry to the application’s web.config file, but you can do this manually:
<configuration>
<system.web>
<roleManager enabled=”true” />
<!– Note that you can use roles with Windows authentication
as well; you do not need to use forms authentication. Often
it is very useful to map Windows accounts to custom roles
as well. But now we use forms auth. for our examples. –>
<authentication mode=”Forms” />
</system.web>
</configuration>
With this configuration in place, ASP.NET automatically creates a file-based database, ASPNETDB.MDF, in the application’s App_Data directory. If you wish, you can use a custom store, by completing the next steps:
1. Create the data store either by using aspnet_regsql.exe or by executing the TSQL command scripts included in the .NET Framework directory.
2. Configure the roles provider to use the previously created custom store.
You can use <roleManager> tag to configure the roles provider. You can either use a different database or use a completely different store if you want. You can use the same tag to configure certain properties that can’t be configured in the WAT.
<configuration>
<connectionStrings>
<add name=”MySqlStore” connectionString=”data source=(local); Integrated Security=SSPI;initial catalog=MySqlDB”/>
</connectionStrings>
<system.web>
<roleManager enabled=”true”
defaultProvider=”CustomSqlProvider”
cacheRolesInCookie=”true”
cookieName=”.MyRolesCookie”
cookieTimeout=”30″
cookieSlidingExpiration=”true”
cookieProtection=”All”>
<providers>
<add name=”CustomSqlProvider”
type=”System.Web.Security.SqlRoleProvider”
connectionStringName=”MySqlStore”
applicationName=”RolesDemo”/>
</providers>
</roleManager>
<authentication mode=”Forms”/>
<compilation debug=”true”/>
</system.web>
</configuration>
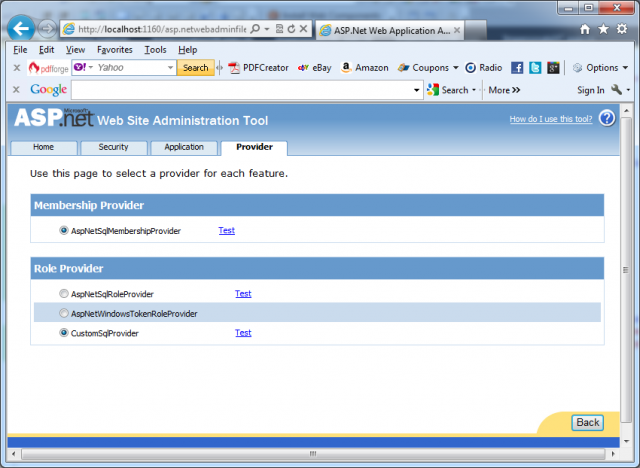
As soon as you have added this configuration entry to your web.config file, you can select the provider through the WAT. To do this you have to switch to the Provider tab and then click the link Select a Different Provider for Each Feature.

