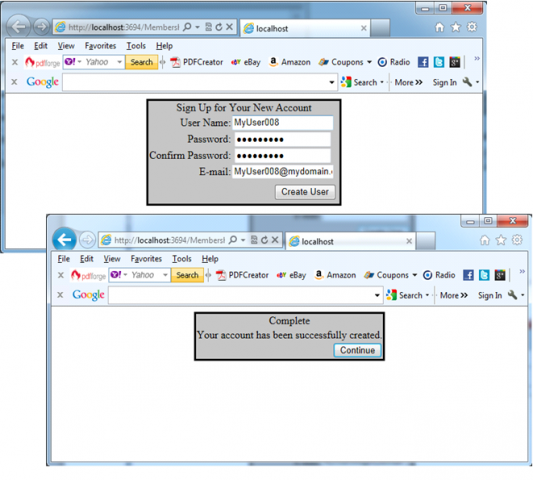
The CreateUserWizard control enables you to create registration pages very quickly. This control is a wizard control with two default steps:
1. For querying general user information.
2. For displaying a confirmation message.
As the CreateUserWizard inherits from the base Wizard control, and you add as many wizard steps as you want. If you use as example the next code:
<form id=”form1″ runat=”server”>
<div align=”center”>
<asp:CreateUserWizard ID=”CreateUserWizardCtrl” runat=”server”
MembershipProvider=”AspNetSqlMembershipProvider”
BorderStyle=”Solid” BackColor=”Silver”>
<WizardSteps>
<asp:CreateUserWizardStep runat=”server” />
<asp:CompleteWizardStep runat=”server” />
</WizardSteps>
</asp:CreateUserWizard>
</div>
</form>
the result will be:
If you wish you can customize the default appearance of the control through properties and styles. When you use the CreateUserWizard control as shown previously, you don’t need to perform any special configuration. It automatically uses the configured membership provider for creating the user, and it includes two steps:
- The default CreateUserWizardStep that creates controls for gathering the necessary information.
- The CompleteWizardStep for displaying a confirmation message.
Both steps are customizable through styles and properties or through templates. Although you can customize these two steps, you cannot remove them. If you use templates, you are responsible for creating the necessary controls, as follows:
<form id=”form1″ runat=”server”>
<div align=”center”>
<asp:CreateUserWizard ID=”CreateUserWizardCtrl” runat=”server” MembershipProvider=”AspNetSqlMembershipProvider”
BorderStyle=”Solid” BackColor=”Silver”>
<WizardSteps>
<asp:CreateUserWizardStep>
<ContentTemplate>
<table>
<tr>
<td align=”left”>
UserName:
</td>
<td>
<asp:TextBox ID=”UserName” runat=”server” Width=”160px”></asp:TextBox>
</td>
</tr>
<tr>
<td align=”left”>
Password:
</td>
<td>
<asp:TextBox ID=”Password” runat=”server” TextMode=”Password” Width=”160px”></asp:TextBox>
</td>
</tr>
<tr>
<td align=”left”>
Confirm Password:
</td>
<td>
<asp:TextBox ID=”ConfirmPassword” runat=”server” TextMode=”Password” Width=”160px”></asp:TextBox>
</td>
</tr>
<tr>
<td align=”left”>
Email:
</td>
<td>
<asp:TextBox ID=”Email” runat=”server” Width=”160px”></asp:TextBox>
</td>
</tr>
</table>
</ContentTemplate>
</asp:CreateUserWizardStep>
<asp:CompleteWizardStep>
<ContentTemplate>
Your account has been successfully created.
<asp:Button ID=”ContinueButton” CommandName=”Continue” runat=”server” Text=”Continue” />
</ContentTemplate>
</asp:CompleteWizardStep>
</WizardSteps>
</asp:CreateUserWizard>
</div>
</form>
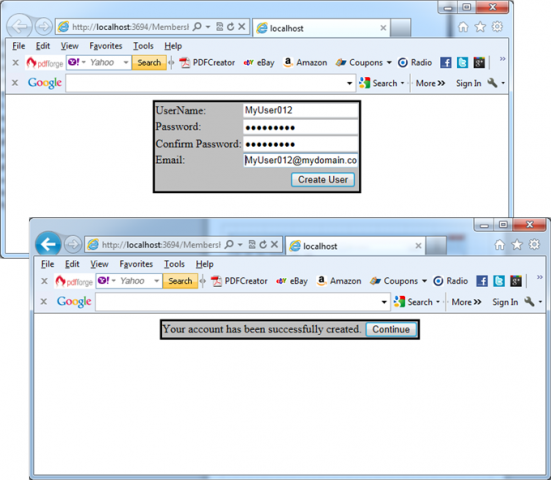
The next pictures present the result:
The first step doesn’t require any buttons because a Next button (in our case “Create User” ) is automatically displayed by the hosting wizard control. Depending on the configuration of the membership provider, some of the controls in the first step are required, and others are not, as listed in the next table:
|
ID |
Type |
Required? |
Notes |
| UserName | System.Web.UI.WebControls.TextBox | Yes | Always required |
| Password | System.Web.UI.WebControls.TextBox | Yes | Always required |
| ConfirmPassword | System.Web.UI.WebControls.TextBox | Yes | Always required |
| System.Web.UI.WebControls.TextBox | No | Required only if the RequireEmail property of the CreateUserWizard control is set to true | |
| Question | System.Web.UI.WebControls.TextBox | No | Required only if the underlying membership provider requires a password question |
| Answer | System.Web.UI.WebControls.TextBox | No | Required only if the underlying membership provider requires a password question |
| ContinueButton | Any control that supports bubbling | No | Not required at all, but if present, you need to set the CommandName to Continue |


